Welcome to our detailed guide on crafting a tattoo machine without the need for a motor. If you’re a tattoo enthusiast or a professional tattoo artist looking to explore the art of handmade tattoo machines, you’ve come to the right place. In this comprehensive article, we’ll provide you with step-by-step instructions and insights into creating your very own tattoo machine without the use of a motor. Let’s dive right in.
Introduction
Tattooing is an intricate art that involves the use of a tattoo machine to create permanent designs on the skin’s surface. While traditional tattoo machines rely on a motor for their operation, it’s possible to fashion a simple yet effective device without a motor. This DIY approach can provide a unique experience for both the artist and the client.
Understanding the Basics
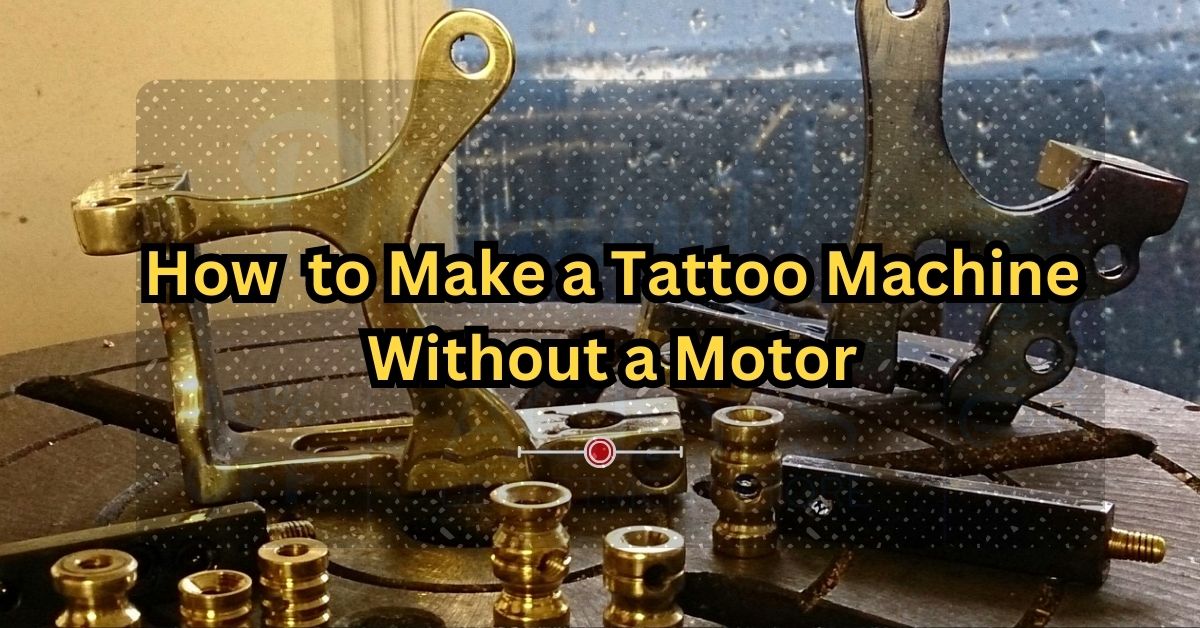
Before we embark on this creative journey, it’s crucial to understand the fundamentals of a tattoo machine. Tattoo machines consist of several key components, including the frame, needle mechanism, grips, tubes, and a power source. The motor in a conventional tattoo machine drives the needle up and down, depositing ink into the skin. A typical tattoo machine operates by using electromagnetic coils to control the movement of the needle. However, for the purpose of this guide, we will be focusing on a different approach that doesn’t involve a motor. In the absence of a motor, we’ll need to replicate this motion using mechanical principles.
Tools and Materials You’ll Need
Before you begin, gather the following materials:
Frame: Begin by selecting a sturdy and lightweight frame for your tattoo machine. Many crafters opt for materials like aluminum or stainless steel due to their durability and ease of shaping.
Needle Holder: Choose a needle holder that securely holds the tattoo needle in place. This component will be essential in ensuring precise and controlled movement.
Armature Bar: The armature bar will act as a mechanism to transfer motion from your hand to the tattoo needle. It should be lightweight and capable of smooth movement.
Springs: Springs play a crucial role in regulating the up-and-down movement of the armature bar. Different combinations of springs can provide varying levels of flexibility.
Tattoo Needles: Select high-quality tattoo needles based on the type of tattooing you’ll be doing. Needles come in various configurations for shading, lining, and coloring.
Grip: The grip is where you’ll hold the tattoo machine. Choose a comfortable grip that allows for precise control over the machine’s movement.
Rubber Bands: Rubber bands are used to create tension in the machine, aiding in controlling the depth of needle penetration.
Step-by-Step Guide
Now, let’s break down the process of making a tattoo machine without a motor:
1. Assembling Your Tattoo Machine
Designing the Frame: Begin by designing or acquiring a sturdy frame that will serve as the foundation of your tattoo machine. The frame should be crafted from durable materials such as stainless steel or aluminum to ensure stability during the tattooing process. Sketch the design of your tattoo machine frame on paper, ensuring it accommodates the components you’ll be using.
Cutting and Shaping: Use appropriate tools to cut and shape the frame material according to your design. This will serve as the foundation of your DIY tattoo machine.
2. Crafting the Needle Holder
The needle holder is a crucial component that holds the tattoo needle securely. Gently insert the needle into the tube, making sure it’s snugly fitted. Use rubber bands to secure the needle in place. The rubber bands will create tension that allows the needle to move up and down effectively.
3. Attaching the Armature Bar
Connect the armature bar to the needle holder. Ensure that the armature bar can move freely and smoothly. This movement will mimic the function of a motor in a traditional tattoo machine.
4. Installing the Springs
Install the springs that will control the movement of the armature bar. The springs should be balanced to provide the right amount of tension and flexibility. Experiment with different spring combinations to find what works best for you.
5. Building the Grips and Tubes
Attaching Grips: Attach the grip to the frame, opposite the needle holder. The grip should be comfortable to hold and allow you to maneuver the machine with precision.
Inserting Tubes: Slide the tube over the needle, ensuring it’s in position to guide the needle’s movement accurately
6. Adding Rubber Bands
Attach rubber bands to the frame to create tension that will regulate the movement of the tattoo needle. The rubber bands should be positioned in a way that ensures consistent and controlled needle motion.
7. Connecting the Clip Cord
The clip cord is responsible for transmitting power from the power source to the tattoo machine. Securely connect the clip cord to the frame, ensuring a stable electrical connection.
8. Sterilizing the Components
Before proceeding, it’s crucial to sterilize all components of the tattoo machine to maintain hygiene and prevent infections. Use an autoclave or other sterilization methods to ensure the safety of both the artist and the client.
9. Loading the Tattoo Ink
Choose high-quality tattoo ink and load it into the needle holder. Properly secure the needle holder to prevent any leaks or spills during the tattooing process.
10. Fine-Tuning and Testing
Before using the machine on skin, perform a series of tests to ensure that the needle movement is smooth, controlled, and precise. Make any necessary adjustments to achieve optimal performance.
Powering Your DIY Tattoo Machine
Since you’re creating a motorless tattoo machine, you’ll need an alternative power source to drive the elastic bands. Follow these steps:
Prepare the Power Supply: Set up your power supply unit according to the manufacturer’s instructions. This may involve connecting wires and adjusting voltage settings.
Connect the Power: Attach one wire from the power supply to the frame and the other to the part of the needle bar connected to the elastic bands. This connection will ensure that the elastic bands move when the power supply is activated.
Test and Adjust: Turn on the power supply and observe the movement of the needle. If the movement is too rapid or too slow, adjust the power supply settings and the tension of the elastic bands accordingly.
Practice on a Surface
Before attempting to tattoo on skin, practice on a suitable surface to get accustomed to the machine’s feel and movement.
Tattooing Process
With the machine ready, begin the tattooing process. Pay close attention to the depth and pressure to ensure clean lines and minimal discomfort for the person receiving the tattoo.
Safety Precautions
While crafting a tattoo machine without a motor can be an exciting endeavor, it’s essential to prioritize safety. Always follow these guidelines:
- Hygiene: Maintain strict hygiene standards by sterilizing all components before use.
- Needle Disposal: Properly dispose of used needles in a sharps container.
- Skin Preparation: Prepare the skin with appropriate products before tattooing to minimize discomfort.
- Ink Quality: Use only high-quality, sterile tattoo ink to prevent infections.
- Skill Development: Practice on synthetic skin or other suitable materials before attempting to tattoo on human skin.
Ensuring Hygiene and Safety
Sterilization: Before use, sterilize all components of your tattoo machine to prevent infections.
Workspace Sanitization: Maintain a clean and sterile workspace to ensure both the artist and the client’s safety.
Tips for Using Your DIY Tattoo Machine
Start with simple designs and practice on non-sensitive surfaces before attempting more complex tattoos.
Communicate clearly with your client and ensure their comfort throughout the process.
Prioritize safety and hygiene to avoid complications.
Enhancing Your DIY Tattoo Machine
To elevate your DIY tattoo machine, consider these creative suggestions:
Experiment with Different Needles
Try various needle configurations and groupings to achieve different tattooing effects. Different needle arrangements can result in finer lines, shading, or coloring.
Personalize Your Grip
Customize your grip by adding textures or patterns that improve your hold and enhance your artistic flair.
Explore Tattoo Techniques
Practice different tattoo techniques to expand your skills. Experiment with line work, shading, and stippling to create captivating designs.
Tips for Success
Precision is Key: Pay attention to every detail, from the design transfer to the actual tattooing. Precision will ensure a professional-looking tattoo.
Practice Patience: Tattooing requires a steady hand and patience. Take your time to create an artwork that both you and the recipient will cherish.
Maintain Hygiene: Sterilization and hygiene are paramount. Keep your workspace and tools clean to prevent infections.
Seek Feedback: If you’re a beginner, seek feedback from experienced tattoo artists to improve your technique.
Conclusion
Crafting a tattoo machine without a motor can be a fulfilling and artistic endeavor. However, it’s essential to prioritize safety, hygiene, and precision throughout the process. This guide has provided you with a step-by-step approach, materials list, tips, and precautions to help you create a DIY tattoo machine that delivers impressive results. Remember that while making your own machine can be exciting, professional tattoo artists often rely on motorized machines for consistent and efficient tattooing. If you’re a beginner, don’t hesitate to seek guidance and feedback from experienced artists as you embark on this creative journey.
FAQs (Frequently Asked Questions)
Absolutely. With practice and attention to detail, your DIY tattoo machine can produce tattoos of comparable quality to those created with commercial machines.
When crafted correctly and used with proper hygiene practices, a homemade tattoo machine can be safe. However, always prioritize safety and cleanliness.
While prior tattooing experience can be beneficial, it’s not mandatory. This guide provides comprehensive instructions suitable for beginners and experienced tattoo artists alike.
If you encounter issues like inconsistent needle movement or poor ink flow, revisit the assembly steps and make necessary adjustments.
It’s recommended to use tattoo-specific needles for safety and precision.
It’s not recommended, as sterilization might be challenging, increasing the risk of infection.